Author:
Lutz Pietschker
Version: 2012-07-11
Home Page | Kayaking Main Page | Link Pages | What's New
Wer diese Informationen gerne auf deutsch hätte, schreibt mir bitte eine Mail.
When we used our new Greenland II for the first time, we found what we had expected: As in the hard-shell Klepper we used before, we needed to upholster the seats considerably, by about 10 cm, to be able to paddle comfortably. Not really surprising; at an average size of 162 cm between us we are not quite able to walk upright under the spray deck, but we have to hold the paddles uncomfortably high to let them see the water. (I also found that the rudder pedal assembly is not really satisfying, more on this project
on another page.)
We have used this assembly for two years now, and it stood the test of actual usage well.
I made a 3D model of the seat elevator frames (Google Sketchup format) that you can download here (530 MB ZIP) (this file also contains the rudder pedal modification described here).
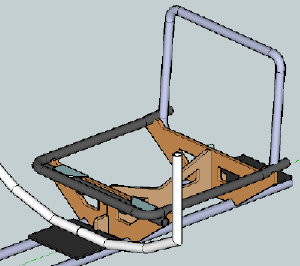
I wanted some construction that would elevate the seat by 10 cm, that would be stable enough for my weight, that could be easily disassembled and that was small and flat enough to be packed together with the Folbot Airfom seats we use. What I came up with was this construction (seen from bow to stern):
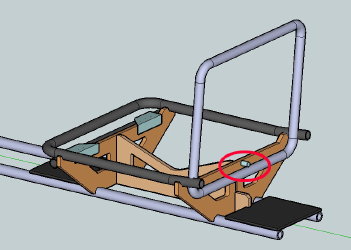
Each seat elevator frame is made from 3 parts, all made from 9mm resin-coated plywood (light, cheap and easy to process, but looking back I should have taken some sturdy 10mm acrylic or even reinforced epoxy, it would have saved a lot of work varnishing the edges). The complete weight of the frames (without the seat) is 660 g per seat. The design is easy enough: The main idea was to lock the frames to the keel, to use only a few bolts (if at all) to save assembly/disassembly time, and to allow the seats to lock to the frame for better stability when carrying the boat. The design works like this: The slotted ends of the lengthwise part lock into the plastic plates of the keel when inserted diagonally and then turned.

The front and back plates are inserted to fit over the M5 bolts and then pressed down vertically and locked by fastening wing nuts (with washers) over the bolts. The front and back plate center the lengthwise plate, and that in turn keeps the frame from falling off by holding on to the keel plates. To place the assembly firmly on the keel tubes, grip the hole in the lengthwise plate with your fingers and press each cross plate down with your thumb while fastening the screw.
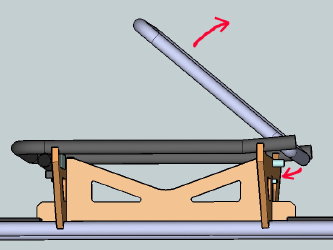
The seat is now placed on the frame so that the crosswise bar (with the clips that normally clip onto the keel tubes but that have no function now) comes in front of the front plate, under the two brackets. The lengthwise part of the seat fits into the half-round notches in the front and end frames. The backrest, folded to the front, slides over the bolt on the backside of the back plate and locks the seat against that bolt when folded upright again. You may need to experiment with the exact dimensions of the parts so that they fit your seat exactly. In my seats, for example, the lengthwise tubes are not exactly parallel, they flare a bit towards the stern.
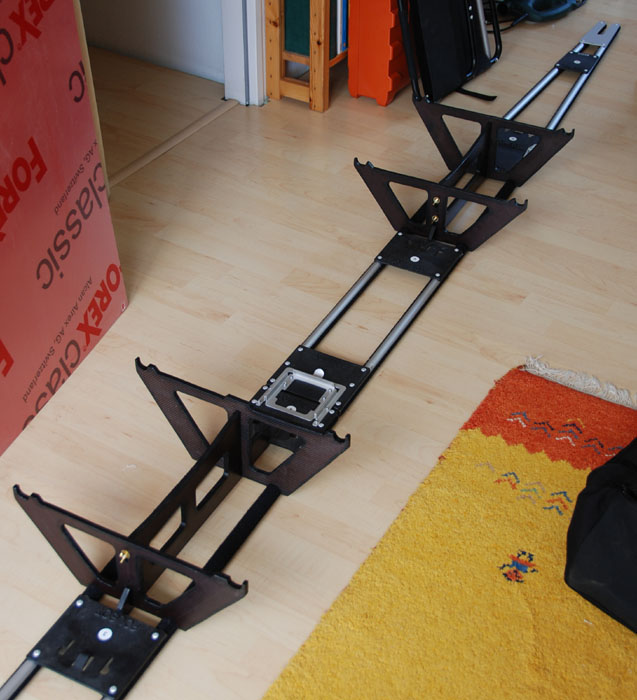
Here are some additional photos of the seat frames:
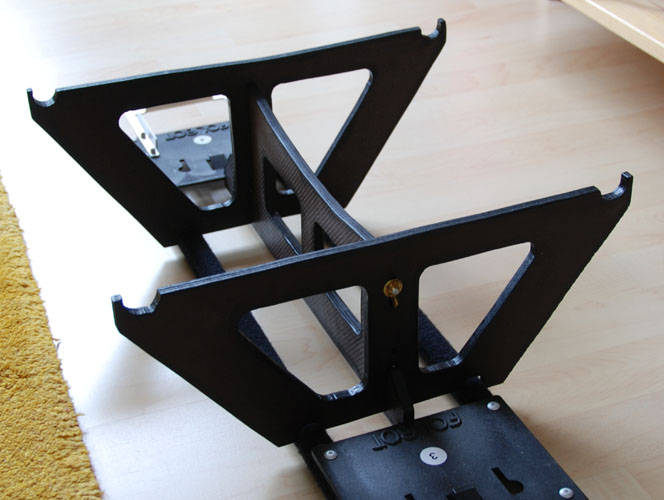
The #1 seat seen from the stern; the brackets and bolt to lock the seat in place are still missing.
Same seat, top view (bow is on left side)
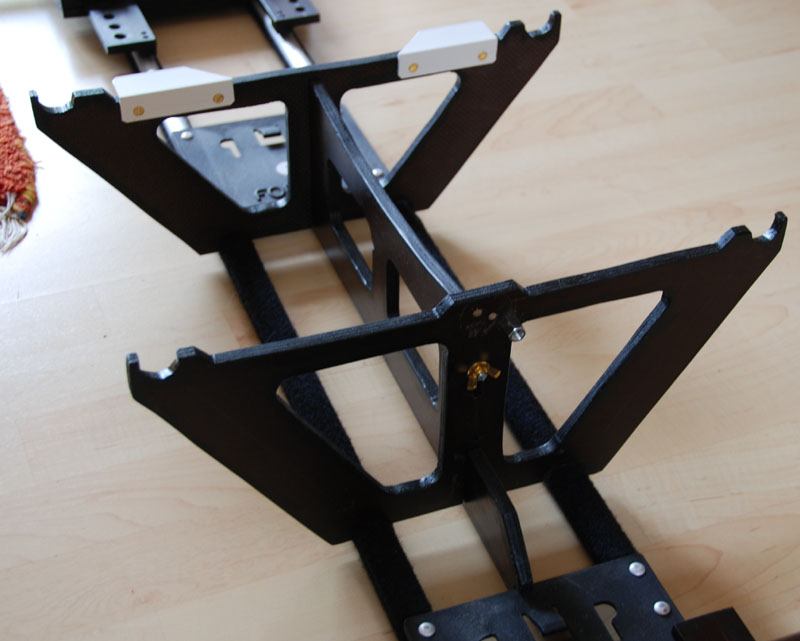
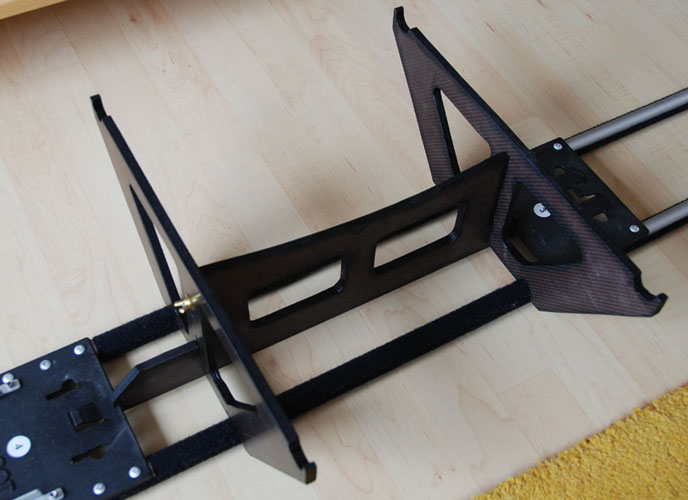
The #2 seat, complete with brackets and bolt.
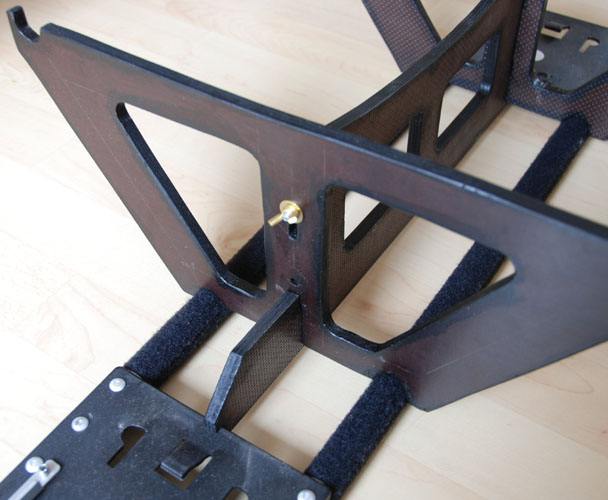
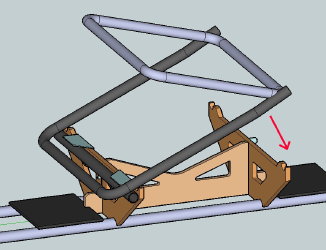
Detail: How the seat frame fits into the keel tubes and plates.
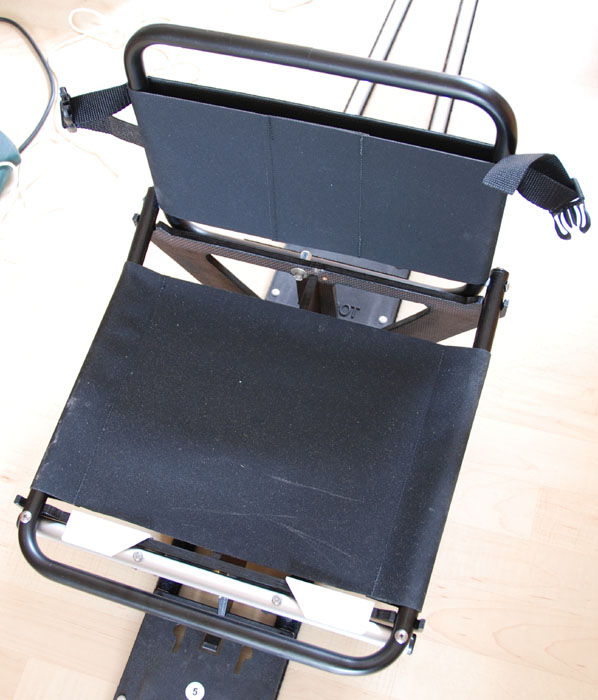
Complete with Airfom seat frame (cushion removed)
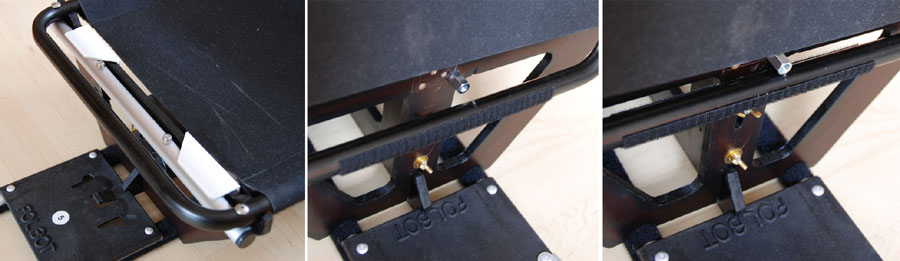
How the Airfom seat is locked onto the frame
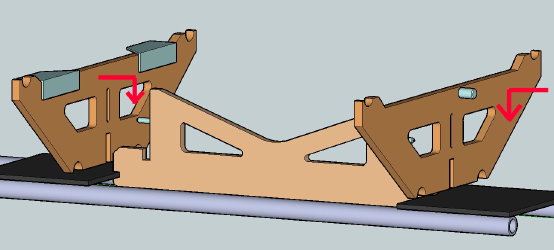
We found it necessary to add a crosswise strap to stabilize the seats:

I drilled two holes into the coamings and passed slings through; knots on the outside keep them from sliding through the holes (green arrows). I screwed two straps with clasps to the back of the seats (purple arrows), that's all. This stabilized the seats enough for our demands.
As the author of this page I take no expressed or implied responsibility for the content of external links; opinions expressed on such pages are not necessarily mine. The web space provider is not responsible for the contents of this page or any linked pages.
Written and published by Lutz Pietschker. Please send comments about technical problems to the
site master.
-Made with a Mac!-
, last change 2011-03-12